You've just unboxed a gleaming new desktop computer, its potential humming quietly within a maze of components and cables. This moment is filled with promise, but for many, it's also tinged with a hint of intimidation. Where do all these wires go? What steps are crucial to ensure a smooth, secure, and powerful start? Navigating this initial setup correctly is the most important investment you can make in your machine's long-term health and your own computing satisfaction.
This comprehensive guide is designed to transform that initial apprehension into confident mastery. We will walk you through every critical phase of the setup process, from the physical assembly on your desk to the essential software configurations that protect your privacy and performance. By the end, you'll have a fully operational system that is not just functional, but optimized, secure, and tailored for how you work and play in 2026. Let's turn that box of parts into your new digital command center.
Stage 1: Unboxing and Physical Assembly
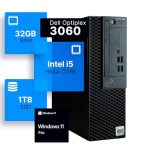
Begin by carefully unboxing all components on a clean, spacious, and static-free surface, ideally a wooden or laminate table. Keep all packaging until setup is complete, in case you need to return anything. Identify the core parts: the computer case (tower), monitor, keyboard, mouse, and power cables. Modern desktops often come with the core components like the CPU, RAM, and storage pre-installed, but you should still have peripheral cables to connect. If you purchased a custom-built or DIY PC, you will have already assembled the internal components; this guide focuses on the standard out-of-box setup for pre-built systems.
Next, position your tower in its permanent home. Choose a location with good ventilation—avoid enclosing it in a tight cabinet or pushing it against a wall where exhaust fans can't breathe. Dust is a computer's enemy, so a raised position off carpeted floors is ideal. Connect the monitor to the tower using the correct cable, which is typically an HDMI or DisplayPort cable for the best image quality. Plug the keyboard and mouse into USB ports, preferably on the rear of the tower to keep the front ports free for temporary devices like flash drives. Finally, connect the power cables to the tower, monitor, and any speakers, but do not turn anything on yet.
Before hitting the power button, perform a final cable management check. Use Velcro straps or twist ties to bundle loose cables together, reducing clutter and improving airflow behind your desk. This not only looks professional but also makes cleaning and future upgrades easier. Ensure all connections are snug. A loose HDMI cable can cause a "no signal" error that is easily mistaken for a hardware failure. Once everything is physically connected and organized, plug the power strip into the wall outlet and you're ready for the first boot.
Stage 2: Initial Boot and Operating System Setup
Press the power button on your tower, then immediately press the button on your monitor. The system will power on, and you should see the manufacturer's logo. For a brand-new PC, this will initiate the Out-of-Box Experience (OOBE) for your operating system, which as of 2026, is likely a recent version of Windows, macOS (for an iMac or Mac Studio), or a Linux distribution. The process will guide you through selecting your region, language, and keyboard layout. Take your time here, as changing some of these settings later can be cumbersome.
You will then be prompted to connect to your Wi-Fi network or, for optimal stability and speed, connect directly via an Ethernet cable to your router. A wired connection is highly recommended for the upcoming steps, which involve downloading significant updates. The system will then check for critical OS updates. It is imperative to install these immediately. In 2026, day-one updates are not just about features; they contain vital security patches for vulnerabilities that may have been discovered between the time your PC was manufactured and the day you turned it on. Allow the system to download and install, which may require several restarts.
The most critical part of this stage is creating your user account and configuring privacy settings. When creating your account, if using Windows, consider using a local account instead of a Microsoft account for initial setup to speed up the process, though a Microsoft account is required for accessing the app store and some services. You will be presented with a series of privacy options related to location tracking, diagnostic data, and personalized advertising. For enhanced privacy, it is advisable to toggle most of these settings to "Off." You can always enable specific services later if you find you need them. This step lays the foundation for your digital security.
Stage 3: Installing Critical Drivers and Updates
Even after the OS updates, your computer needs the correct drivers—specialized software that allows the operating system to communicate with your specific hardware. Outdated or missing drivers can lead to poor performance, unstable systems, or hardware like your graphics card or audio not working at all. In 2026, Windows Update does a decent job with basic drivers, but for peak performance, especially for gaming or creative work, manual installation is key. Your first stop should be the support website of your desktop's manufacturer (e.g., Dell, HP, Lenovo) or, for custom builds, the website of your motherboard's maker (e.g., ASUS, MSI, Gigabyte).
On the manufacturer's site, locate the support or downloads section and enter your specific desktop model number. Download and install the latest drivers for your chipset, audio, and network adapters. The most important driver to update manually is your graphics card driver. If you have an NVIDIA or AMD GPU, visit their respective websites directly and use their auto-detect tools or manually select your GPU model to get the latest Game Ready or Adrenalin drivers. These drivers include optimizations for the newest games and applications that generic updates lack.
After installing all drivers, reboot your system. Then, open your operating system's update checker one more time to ensure no new updates were triggered by the driver installations. Finally, update any firmware that may be available. Some manufacturers provide firmware update tools for components like SSDs or monitors, which can improve reliability and performance. Think of this stage as tuning the engine of your car after assembling it; the hardware is connected, but the drivers are what make it purr efficiently and powerfully.
Stage 4: Essential Software and Security Installation
With a stable and updated system, it's time to install the software that turns a generic PC into your personal tool. Start with a robust security suite. While Windows Defender (now part of Microsoft Defender in 2026) is quite capable, many users prefer a comprehensive third-party internet security suite from reputable vendors like Bitdefender, Kaspersky, or Norton. Install one and run a full system scan to ensure your fresh system is clean. Next, install a trusted password manager; this is non-negotiable for modern digital life. Tools like Bitwarden, 1Password, or LastPass will help you generate and store complex, unique passwords for all your accounts.
Now, move on to productivity and daily-use software. Install your preferred web browser (Chrome, Firefox, Edge, or a privacy-focused alternative like Brave). Install a document suite like Microsoft 365 or the free LibreOffice. For communication, consider apps like Discord, Slack, or Zoom. Do not simply download software from random websites. Always use the official developer website or trusted app stores like the Microsoft Store or vendor sites like Adobe.com. This avoids bundled malware and "crapware" that often comes with downloads from unofficial portals.
Finally, configure your backup solution immediately. The 3-2-1 rule is a best practice: have at least three copies of your data, on two different types of media, with one copy offsite. Set up File History in Windows or Time Machine on macOS to an external hard drive for local backups. Then, subscribe to a cloud backup service like Backblaze or iDrive for offsite protection. Configure these backups to run automatically. The time to set up backups is before you need them, not after a drive failure or ransomware attack. This stage transforms your PC from a vulnerable new machine into a secure, personalized, and resilient workstation.
Stage 5: Personalization and Performance Optimization
This final stage is about making the computer truly yours and ensuring it runs efficiently. Begin with personalization: set your desktop wallpaper, configure your preferred light or dark mode, and adjust your monitor's resolution and refresh rate through the display settings to match its native specs for the sharpest image. Organize your Start Menu or Dock with shortcuts to your most-used applications. Customize your mouse sensitivity and keyboard repeat rate in the system settings to match your comfort.
Next, tackle performance optimization. Open your system's startup programs list (Task Manager > Startup tab in Windows). Disable any unnecessary applications from launching at boot. This dramatically improves startup time and reduces background resource usage. For users with Solid State Drives (SSDs), ensure that TRIM is enabled (it usually is by default in 2026), which helps maintain SSD speed over time. If you have a traditional Hard Disk Drive (HDD) for bulk storage, run a disk defragmentation tool, though modern Windows schedules this automatically.
Create a system maintenance routine. Use the built-in Storage Sense tool in Windows to automatically clean temporary files. Schedule your security software and backup tools to run regular scans during times you're not using the PC. Finally, consider installing a system monitoring tool like HWMonitor or the built-in Xbox Game Bar performance widget to keep an eye on temperatures and component usage, which is valuable for diagnosing any future issues. With these steps, your setup is not just complete; it's refined, responsive, and ready to handle your workload for years to come.
Key Takeaways
- ✓ Proper physical setup, including ventilation and cable management, is foundational for long-term hardware health and a clean workspace.
- ✓ The initial operating system setup is critical for security; always install all updates and carefully configure privacy settings before doing anything else.
- ✓ Manually installing the latest hardware drivers, especially for your graphics card, from manufacturer websites is essential for achieving peak performance and stability.
- ✓ Installing robust security software, a password manager, and configuring an automated 3-2-1 backup strategy are non-negotiable steps for protecting your data and privacy.
- ✓ Personalizing settings and optimizing startup programs and maintenance routines tailors the PC to your needs and ensures it remains fast and organized over time.
Frequently Asked Questions
Do I need to buy antivirus software for my new Windows PC in 2026?
Windows includes a capable built-in security suite called Microsoft Defender. For most users, this provides sufficient baseline protection when combined with smart browsing habits. However, a dedicated third-party internet security suite often offers more comprehensive features like advanced firewall controls, phishing protection for financial data, and robust parental controls. For maximum peace of mind, especially for less experienced users, investing in a reputable third-party solution is recommended.
How do I know if all my drivers are correctly installed?
You can check in your Device Manager (search for it in the Start menu). Look for any devices marked with a yellow exclamation point or question mark; these indicate missing or problematic drivers. For key components like your display adapter (graphics card), sound, and network adapters, you can right-click, select "Properties," and check the driver version. Compare this version number to the one listed on the manufacturer's website to see if you have the latest.
Should I set up my PC with a local account or a Microsoft account?
This is a trade-off. A local account offers more privacy and a faster setup process. However, a Microsoft account is required to sync settings across Windows devices, download apps from the Microsoft Store, and access services like OneDrive and Xbox Live seamlessly. For a fully integrated Windows ecosystem experience, a Microsoft account is beneficial. You can adjust most privacy settings associated with it after creation.
What is the single most important thing to do after setting up my new computer?
Without a doubt, configure an automated backup system. Hardware can fail, malware can strike, and files can be accidentally deleted. Setting up both a local backup (to an external drive) and a cloud backup service ensures your precious data—documents, photos, and projects—is recoverable no matter what happens. Doing this on day one protects the work and personalization you will immediately begin adding.
My new desktop seems loud. Is this normal?
During the initial setup, it's normal for the fans to run at higher speeds as the system performs intensive tasks like installing updates and indexing files. This should subside after a few hours. If the noise persists, check that the computer has adequate airflow and is not placed in an enclosed space. You can also check the fan curves in the system BIOS or using manufacturer-provided software. Some pre-built systems have "performance" modes that keep fans higher; you may be able to switch to a "quiet" mode in the included control software.
Conclusion
Setting up a new desktop computer is a multi-stage journey that blends physical assembly with crucial digital configuration. By methodically progressing from unboxing and cable management through operating system setup, driver installation, security hardening, and final personalization, you build a system that is not only powerful but also stable, secure, and uniquely tailored to your needs. Each stage builds upon the last, transforming a collection of components into a reliable and efficient partner for work, creativity, and entertainment.
Now that your digital command center is fully operational, take a moment to explore its capabilities. Load your favorite application, adjust a setting to your liking, or simply enjoy the crisp display and responsive performance. The effort invested in this careful setup pays dividends every day in the form of a faster, safer, and more enjoyable computing experience. Welcome to your new PC, optimized for 2026 and beyond.

Nathaniel Foster is an electronics expert focusing on consumer gadgets, smart devices, and innovative technology. He delivers practical reviews, buying guides, and troubleshooting tips to help readers make informed decisions and get the most out of their electronic products.