You press the power button, your desktop whirs to life, but your monitor remains a dark, silent void displaying the dreaded "No Signal" message. This modern-day digital heart attack can strike anyone, from casual users to seasoned professionals, instantly halting productivity and sparking frustration. That blank screen is a universal signal of a communication breakdown between your computer and its display, but it’s rarely a sign of a catastrophic failure.
Understanding how to systematically diagnose and fix a "No Signal" error is an essential skill in 2026, where our reliance on desktop computers for work, creativity, and connection continues to deepen. This guide will walk you through a logical, step-by-step troubleshooting process, from the simplest cable checks to more advanced hardware diagnostics. You will learn not just how to restore your display, but how to understand the likely causes, saving you time, money, and unnecessary stress.
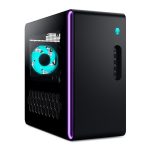
The First Response: Basic Checks and Cable Culprits
Before you panic or consider expensive repairs, always start with the most basic and common causes. Over 50% of "No Signal" issues are resolved at this stage. First, ensure both your desktop tower and your monitor are receiving power. Check that the power cables are securely plugged into both the wall outlet or surge protector and the devices themselves. Look for illuminated power LEDs on both the monitor and the computer case. A monitor in power-saving mode may appear off, so try pressing its power button directly to wake it.
Next, scrutinize the video cable connection with extreme care. This is the single most frequent culprit. Whether you use HDMI, DisplayPort, DVI, or VGA, ensure the cable is firmly seated at both ends—on the back of the monitor and on the output port of your desktop's graphics card or motherboard. If your PC has a dedicated graphics card, the monitor must be plugged into its ports, not the motherboard's integrated ports. Gently unplug and re-seat the cable, ensuring any locking mechanisms on DisplayPort or DVI cables are fully engaged.
Finally, test with a different cable or a different monitor if possible. Cables can fail internally without visible damage. If you have a laptop or another PC, try connecting your monitor to it to rule out a monitor failure. Similarly, try a known-working monitor on your desktop. This simple swap test immediately tells you whether the problem lies with the PC or the display, narrowing your focus significantly and preventing you from troubleshooting the wrong device.
Internal Hardware Diagnostics: Reseating and Resetting
If the basics don't work, the issue likely lies within the desktop tower. Begin by powering down completely and unplugging the PC from the wall. Open the case in a well-lit, static-safe environment. The goal here is to ensure all internal components are properly seated, as vibrations or prior movement can loosen connections over time. Carefully press down on your RAM sticks until the side clips click into place. Do the same for your graphics card, ensuring it is fully seated in its PCIe slot and that any supplemental power cables from the PSU are firmly attached.
A corrupted BIOS/UEFI setting or a lingering electrical charge can also cause a failure to initialize the display. To clear this, perform a CMOS reset. Locate the small, coin-shaped battery on your motherboard. With the power cord removed, carefully pop it out using a non-metallic tool, wait for 60-90 seconds, then reinsert it. Alternatively, many motherboards have a two-pin "CLR_CMOS" jumper; shorting these pins with a metal object (like a screwdriver) for 10 seconds while the system is off achieves the same result. This resets all motherboard settings to factory defaults.
For systems with integrated and dedicated graphics, configuration conflicts can arise. After the CMOS reset, try a different display output. If you were using the dedicated GPU, plug your cable directly into the motherboard's video output. If you get a signal this way, it points to an issue with the dedicated graphics card, its drivers, or its power supply. Listen for POST (Power-On Self-Test) beep codes from your motherboard's internal speaker. A series of beeps, rather than a single short beep, is a coded error message that can indicate a RAM, GPU, or CPU problem.
Software and Driver Conflicts: The Invisible Saboteurs
Sometimes, the hardware is functional, but a software glitch prevents a proper handshake with the monitor. If you can get a signal by booting into Safe Mode (typically by pressing F8 or Shift+F8 during startup), the culprit is almost certainly a driver or software conflict. Safe Mode loads Windows with only essential drivers, bypassing faulty graphics drivers. Once in Safe Mode, you can access your operating system to make critical repairs without the need for a display signal from your standard driver.
The primary action here is to update, roll back, or reinstall your graphics drivers. In Safe Mode, open Device Manager, expand "Display adapters," right-click on your GPU, and select "Properties." Under the Driver tab, you can choose "Roll Back Driver" if the issue started after a recent update. If that's unavailable or doesn't work, select "Uninstall device" and check the box to delete the driver software. Restart your PC; Windows will attempt to install a basic display driver, which may restore functionality and allow you to cleanly install the latest driver from the manufacturer's website.
Beyond drivers, consider system file corruption. From Safe Mode or using Windows Installation Media, you can run built-in repair tools. Open Command Prompt as Administrator and run "sfc /scannow" to scan and repair protected system files. Following that, run "DISM /Online /Cleanup-Image /RestoreHealth" to fix the Windows image itself. Also, a recent Windows update can be incompatible. If the issue coincided with an update, you can use System Restore to revert your PC to a point before the update was installed, often resolving mysterious conflicts.
Advanced Hardware Isolation: Pinpointing the Faulty Component
When simpler steps fail, you must systematically isolate the failing hardware component. This process requires patience and, ideally, access to spare parts for testing. Start with the RAM, a common point of failure. If you have multiple sticks, try booting with only one stick installed, trying each stick in the primary RAM slot. This can identify a single faulty memory module. Listen for beep codes; continuous short beeps often indicate a RAM problem.
Next, focus on the graphics processing unit. If your CPU has integrated graphics, remove the dedicated GPU entirely and connect your monitor to the motherboard. A successful boot confirms the dedicated GPU or its power supply is the issue. Test the GPU in another PC if possible. Also, ensure your Power Supply Unit (PSU) is adequate. A failing or underpowered PSU may not provide the stable power the GPU needs to initialize, especially under load. You can test this by using a PSU tester or temporarily swapping in a known-good, higher-wattage PSU.
Do not overlook the motherboard itself or the CPU. Bent pins in the CPU socket, a failing CMOS battery, or a damaged PCIe slot can all cause a "No Signal" error. A visual inspection is crucial. If you have eliminated RAM, GPU, and PSU, and the motherboard shows no signs of life (no fan spin, no LEDs) or emits error beeps even with minimal hardware, the motherboard or CPU is likely faulty. At this stage, consulting a professional technician for a definitive diagnosis is often the most practical next step.
Preventative Measures and Future-Proofing
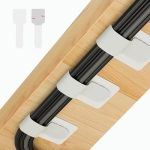
Once you've resolved the immediate crisis, implementing preventative measures can save you from future "No Signal" episodes. First, establish a stable physical environment. Ensure your desktop is on a firm surface, with good ventilation to prevent overheating, which can stress components over time. Use velcro straps or cable ties to manage internal cables, improving airflow and preventing cables from snagging on fans or loosening components. Invest in a good surge protector to shield your system from power fluctuations.
Second, adopt smart software maintenance habits. Before updating your graphics drivers, create a system restore point. Consider using tools provided by your GPU manufacturer (like NVIDIA's GeForce Experience or AMD's Adrenalin Software) for smoother, validated driver updates. Schedule regular maintenance, such as using compressed air to dust out your PC every 6-12 months, as dust buildup can cause overheating and connection issues. Regularly check that all internal connections remain secure.
Finally, keep a basic troubleshooting kit. This should include a known-working HDMI or DisplayPort cable, a spare monitor (or a TV you can use as a temporary display), and a USB drive with your current GPU drivers and a Windows installation media. Document your system's normal boot sequence sounds and LED patterns. In 2026, with components becoming more integrated, understanding the baseline behavior of your system is your first line of defense, turning a panic-inducing blank screen into a manageable, step-by-step puzzle to solve.
Key Takeaways
- ✓ Always start with the simplest solutions: verify power and firmly reseat the video cable at both ends, ensuring you're using the correct port on your PC.
- ✓ Systematically test and isolate hardware by swapping cables, monitors, RAM sticks, and graphics cards to identify the faulty component.
- ✓ Booting into Safe Mode is a critical step to diagnose software and driver conflicts, allowing you to repair or roll back problematic graphics drivers.
- ✓ A CMOS reset can clear corrupted motherboard settings that may prevent display initialization, often resolving stubborn "No Signal" errors.
- ✓ Prevent future issues through regular maintenance, including dusting your PC, managing internal cables, using a surge protector, and creating system restore points before driver updates.
Frequently Asked Questions
My PC turns on and fans spin, but my monitor says "No Signal." Is my GPU dead?
Not necessarily. While a dead GPU is a possibility, this symptom is more commonly caused by loose cables, incorrect input source selection on the monitor, or the monitor being plugged into the motherboard instead of the GPU. Follow the basic troubleshooting steps first—reseat the GPU and its power cables, try a different video cable and port, and test the monitor with another device before concluding the GPU is faulty.
I just installed a new graphics card, and now I get no signal. What did I do wrong?
This is a common issue. First, ensure the GPU is fully seated in the PCIe slot and that all required power connectors from your Power Supply Unit (PSU) are firmly attached. Second, your PSU may not have enough wattage to support the new card; check the GPU's power requirements. Finally, you may need to update your motherboard's BIOS/UEFI to support the new card, especially if it's a very new model in an older system.
Can a "No Signal" error be caused by a problem with the monitor itself?
Absolutely. While the PC is often the suspect, monitors can fail. Signs include no power LED, a flickering or dim power light, or a visible backlight with no image. Test the monitor with a different known-working device (like a laptop or game console). Also, try the monitor's built-in self-test feature (usually found in the menu) which operates independently of the video input.
What do motherboard beep codes mean for a "No Signal" error?
Beep codes are your motherboard's way of telling you what's wrong during the Power-On Self-Test (POST). A single short beep typically means a successful POST. A series of short beeps often indicates a RAM issue. One long beep followed by two or three short beeps frequently points to a graphics card error. The exact patterns vary by manufacturer (AMI, Award, Phoenix), so consult your motherboard's manual for the specific code definitions.
I get a signal in Safe Mode but not in normal Windows boot. What does this mean?
This is a clear indicator of a software or driver problem. Safe Mode loads a basic display driver. The issue is likely a corrupted or incompatible standard graphics driver, a conflicting software application, or a problematic Windows update. Use Safe Mode to roll back, update, or reinstall your graphics drivers, or perform a system restore to a point before the issue began.
Conclusion
A "No Signal" message on your monitor is a disruptive but rarely insurmountable problem. As we've explored, the path to a fix follows a logical escalation from external connections and simple resets to internal hardware diagnostics and software repair. The key is a calm, systematic approach that isolates variables, starting with the most common and easily addressed culprits like cables and input sources before moving to more complex internal components. Understanding this hierarchy of troubleshooting empowers you to solve the majority of these issues independently.
Your desktop is a system of interconnected parts, and its failure to communicate with a display is a symptom, not a final diagnosis. By applying the steps in this guide—and incorporating the preventative measures—you transform a moment of frustration into an opportunity to better understand your technology. The next time your screen stays dark, take a deep breath, remember to check the cable first, and methodically work through the process. Your display will likely be back in action sooner than you think.

Nathaniel Foster is an electronics expert focusing on consumer gadgets, smart devices, and innovative technology. He delivers practical reviews, buying guides, and troubleshooting tips to help readers make informed decisions and get the most out of their electronic products.