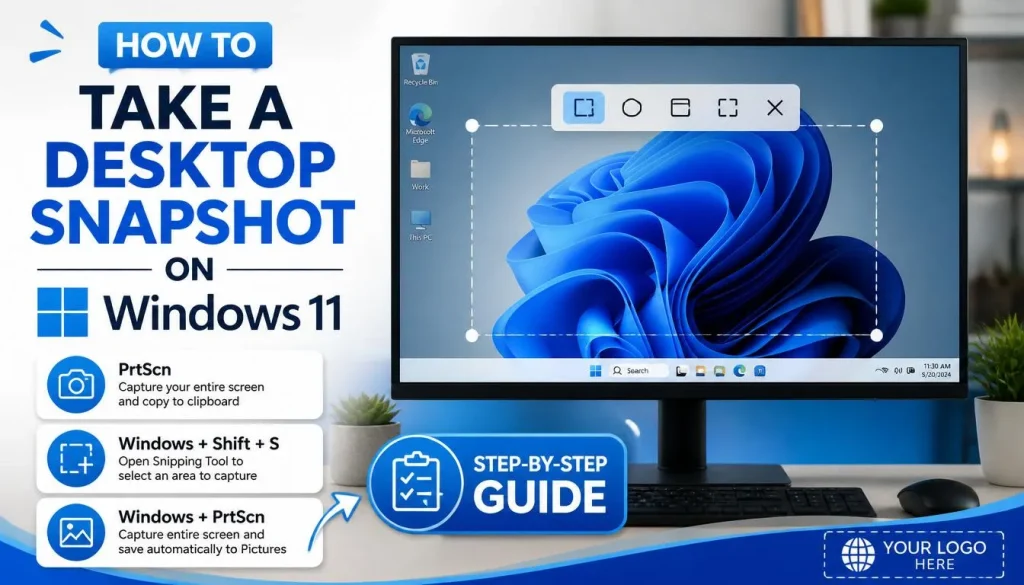
If you need a snapshot of your desktop on Windows 11, the fastest method is Windows + Print Screen. This captures your entire desktop and automatically saves the image to Pictures > Screenshots.
If you only need part of the screen, use Windows + Shift + S to open the Snipping Tool and select exactly what you want to capture.
What Is a Desktop Snapshot?
A desktop snapshot is simply a screenshot of everything currently visible on your computer screen. People commonly use desktop snapshots to:
- Save error messages
- Share technical issues with support teams
- Capture online receipts or confirmations
- Create tutorials and documentation
- Save information before it changes
Windows 11 includes several built-in screenshot methods, each designed for a different situation.
How Do You Take a Snapshot of the Entire Desktop?
The quickest way to capture your whole desktop is:
Method 1: Windows + Print Screen
- Open the desktop or screen you want to capture.
- Press Windows + PrtScn simultaneously.
- Your screen will briefly dim.
- Windows automatically saves the screenshot.
Where Is the Screenshot Saved?
Navigate to:
C:\Users\[YourUsername]\Pictures\ScreenshotsThis folder contains all screenshots captured using the Windows + Print Screen shortcut.
Best For
- Full-screen captures
- Saving screenshots automatically
- Creating documentation
- Capturing multiple windows at once
How Do You Take a Snapshot of Part of the Desktop?
Sometimes you only need a specific area instead of the entire screen.
Method 2: Windows + Shift + S
This shortcut launches the Snipping Tool capture interface.
- Press Windows + Shift + S.
- The screen will dim.
- Select the area you want to capture.
- The image is copied to your clipboard.
- Click the notification preview to edit or save it.
Available Capture Modes
| Mode | What It Captures |
|---|---|
| Rectangular Snip | Drag to select an area |
| Freeform Snip | Draw a custom shape |
| Window Snip | Capture a specific window |
| Fullscreen Snip | Capture the entire desktop |
Best For
- Cropped screenshots
- Tutorials
- Highlighting specific information
- Removing unnecessary content
How Do You Take a Snapshot Using the Snipping Tool?
Windows 11 includes the Snipping Tool application.
Open Snipping Tool
- Click Start.
- Search for “Snipping Tool.”
- Launch the app.
Capture a Screenshot
- Click New.
- Choose the capture type.
- Select the desired area.
- Edit the screenshot if needed.
- Save as PNG, JPG, or GIF.
Advantages
- Built-in annotation tools
- Delay timer options
- Multiple save formats
- Better editing capabilities
How Do You Take a Snapshot of Only the Active Window?
If you only need one application window:
Method 4: Alt + Print Screen
- Click the window you want to capture.
- Press Alt + PrtScn.
- The active window is copied to your clipboard.
- Open Paint, Word, or another application.
- Press Ctrl + V to paste.
- Save the image.
Best For
- Capturing software windows
- Creating support tickets
- Sharing application screenshots
How Do You Take a Snapshot on Multiple Monitors?
If you use two or more displays, Windows handles screenshots differently depending on the method used.
Entire Multi-Monitor Setup
Press:
Windows + PrtScnWindows captures all connected displays as one large image.
Single Monitor Capture
Use:
Windows + Shift + SThen manually select the monitor or area you want.
Recommended Method
For dual-monitor setups, the Snipping Tool provides more control and avoids excessively large screenshots.
How Do You Take a Snapshot and Copy It Directly to the Clipboard?
Sometimes you don’t need a saved file.
Method 5: Print Screen Key
Press:
PrtScnWindows copies the entire desktop screenshot to your clipboard.
You can then paste it into:
- Microsoft Word
- Outlook
- Teams
- Slack
- Paint
- Photoshop
Best For
- Fast sharing
- Emails
- Chat messages
- Temporary screenshots
What Are the Best Screenshot Tools Beyond Windows?
Built-in Windows tools are sufficient for most users, but advanced users may need additional features.
| Tool | Why People Use It |
|---|---|
| Snipping Tool | Built into Windows 11 |
| ShareX | Advanced automation and editing |
| Greenshot | Lightweight annotation tool |
| Lightshot | Fast sharing and editing |
| Snagit | Professional documentation workflows |
Which Tool Is Best?
- Casual users: Snipping Tool
- IT professionals: ShareX
- Business documentation: Snagit
What If Print Screen Isn’t Working?
This is one of the most common screenshot problems.
Why Is the Print Screen Key Not Taking Screenshots?
Check Keyboard Settings
Some laptops require:
Fn + PrtScninstead of simply pressing Print Screen.
Enable Screenshot Shortcut
- Open Settings.
- Navigate to:
Accessibility > Keyboard- Enable:
Use the Print Screen button to open screen snippingRestart Windows Explorer
- Press:
Ctrl + Shift + Esc- Open Task Manager.
- Locate Windows Explorer.
- Right-click and choose Restart.
Update Keyboard Drivers
- Right-click Start.
- Open Device Manager.
- Expand Keyboards.
- Update the driver.
Why Is My Screenshot Black?
A black screenshot usually occurs when:
- Capturing DRM-protected streaming content
- Taking screenshots of protected video playback
- Graphics driver conflicts
Common Examples
- Netflix
- Disney+
- Prime Video
- Some banking applications
This limitation is intentional and often cannot be bypassed through standard screenshot methods.
Where Are Screenshots Stored in Windows 11?
Depending on the method used:
| Screenshot Method | Save Location |
|---|---|
| Windows + PrtScn | Pictures\Screenshots |
| PrtScn | Clipboard only |
| Alt + PrtScn | Clipboard only |
| Windows + Shift + S | Clipboard until saved |
| Snipping Tool | User-selected location |
Knowing the save location can save significant troubleshooting time.
Quick Reference Table
| Task | Shortcut |
|---|---|
| Capture entire desktop and save | Windows + PrtScn |
| Capture selected area | Windows + Shift + S |
| Capture active window | Alt + PrtScn |
| Copy full screen to clipboard | PrtScn |
| Open Task Manager | Ctrl + Shift + Esc |
| Paste screenshot | Ctrl + V |
| Screenshot folder | Pictures\Screenshots |
FAQ on take a Snapshot of Your Desktop on Windows 11
How do I take a snapshot of my desktop without the Print Screen key?
Use Windows + Shift + S to launch the Snipping Tool and capture any area of your screen.
Where do desktop snapshots go in Windows 11?
Screenshots taken with Windows + Print Screen are saved in:
Pictures\ScreenshotsHow do I take a screenshot on a laptop?
Many laptops require Fn + PrtScn instead of the Print Screen key alone.
Can I take a screenshot of only one monitor?
Yes. Press Windows + Shift + S and select only the monitor or area you want to capture.
Why isn’t my screenshot saving automatically?
Automatic saving only occurs when using Windows + Print Screen. Other methods typically copy the image to the clipboard until you save it manually.
How do I edit a screenshot after taking it?
Open the screenshot in the Snipping Tool, Paint, or a third-party editor such as ShareX or Snagit.
Can Windows 11 record the screen as well as take screenshots?
Yes. The built-in Snipping Tool and other Windows features now support screen recording in addition to screenshots.
Closing
For most Windows 11 users, Windows + Print Screen should be your default method because it captures the entire desktop and saves the file automatically. When you need more control, Windows + Shift + S is the fastest way to capture a specific area without extra editing.

Nathaniel Foster is an electronics expert focusing on consumer gadgets, smart devices, and innovative technology. He delivers practical reviews, buying guides, and troubleshooting tips to help readers make informed decisions and get the most out of their electronic products.