Remote Desktop lets you access a Windows computer from another PC, Mac, smartphone, or tablet. You can open files, run applications, adjust settings, and use the remote computer almost as though you were sitting in front of it.
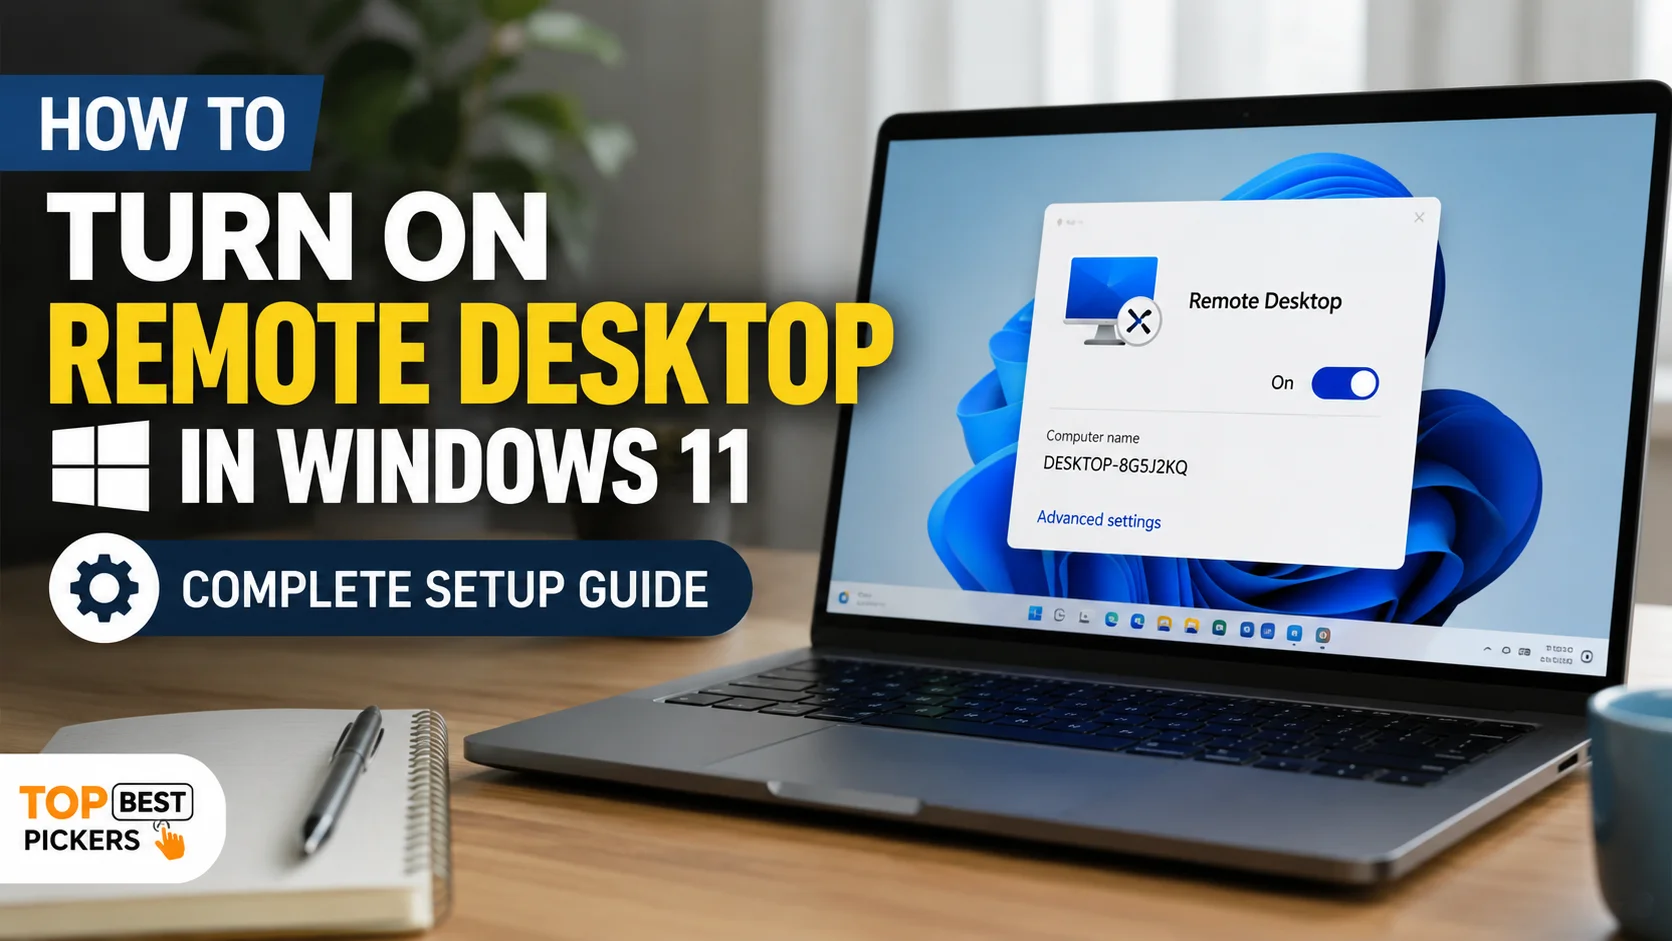
To turn on Remote Desktop in Windows 11, open Settings > System > Remote Desktop, switch on Remote Desktop, and select Confirm. Save the computer’s PC name because you will need it when connecting from another device.
The computer receiving the connection must run a supported edition of Windows, such as Windows 11 Pro, Enterprise, or Education. Windows Home can connect to another Remote Desktop host, but it cannot normally receive incoming Remote Desktop connections.
This guide explains how to turn on Remote Desktop, add authorised users, find the correct PC name or IP address, connect from different devices, secure the connection, and fix common RDP problems.
Quick Answer: How to Turn On Remote Desktop
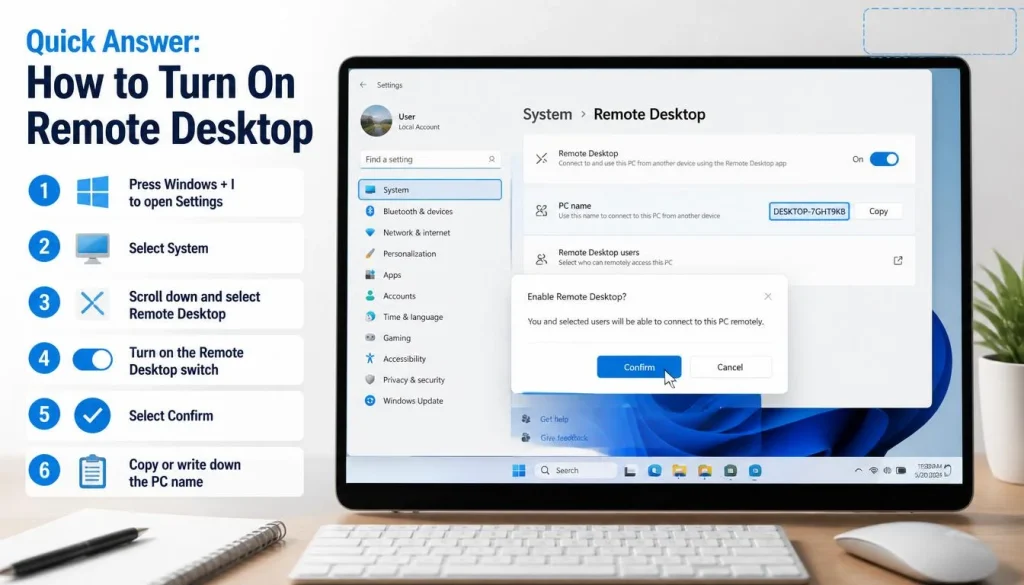
Follow these six steps:
- Press Windows + I to open Settings.
- Select System.
- Scroll down and select Remote Desktop.
- Turn on the Remote Desktop switch.
- Select Confirm.
- Copy or write down the name shown under PC name.
Microsoft recommends keeping Network Level Authentication enabled because it requires users to authenticate before a remote session is created.
What Is Windows Remote Desktop?
Windows Remote Desktop is a built-in remote-access feature that uses Remote Desktop Protocol, commonly called RDP.
It allows an authorised user to connect to a supported Windows computer and interact with its desktop, files, settings, and applications from another compatible device.
The computer you want to control is called the remote PC, host PC, or target computer. The device you use to connect is called the client device.
Remote Desktop is useful when you need to:
- Access a work computer from home
- Use files stored on another Windows PC
- Run software installed on a remote computer
- Manage office computers
- Support authorised users
- Connect to a more powerful PC from a lightweight device
Remote Desktop is different from ordinary screen-sharing software. When you connect through RDP, Windows creates a remote session and sends keyboard, mouse, display, audio, and other supported information between the devices.
Check Whether Your Windows Edition Supports Remote Desktop
Before changing any settings, check the Windows edition installed on the remote PC.
To check your edition:
- Press Windows + I.
- Select System.
- Scroll down and open About.
- Find Windows specifications.
- Check the value next to Edition.
The host computer must use an edition that supports incoming Remote Desktop connections.
| Windows editionCan receive Remote Desktop connections? | Can connect to another remote PC? | |
|---|---|---|
| Windows 11 Home | No | Yes |
| Windows 11 Pro | Yes | Yes |
| Windows 11 Enterprise | Yes | Yes |
| Windows 11 Education | Yes | Yes |
| Supported Windows Server editions | Yes | Yes |
Windows Home includes the Remote Desktop Connection client, which means it can connect to another supported computer. However, it cannot act as a standard Remote Desktop host.
Why Is Remote Desktop Missing in Windows 11 Home?
The Remote Desktop hosting feature is not included with Windows 11 Home. Therefore, the Remote Desktop activation control may be missing, unavailable, or redirect you towards upgrading Windows.
Avoid unofficial RDP wrappers, modified system files, or unsupported registry workarounds designed to bypass edition restrictions. These methods can introduce security, stability, and update problems.
For a Windows Home computer, consider Quick Assist, Chrome Remote Desktop, or another reputable remote-access platform instead.
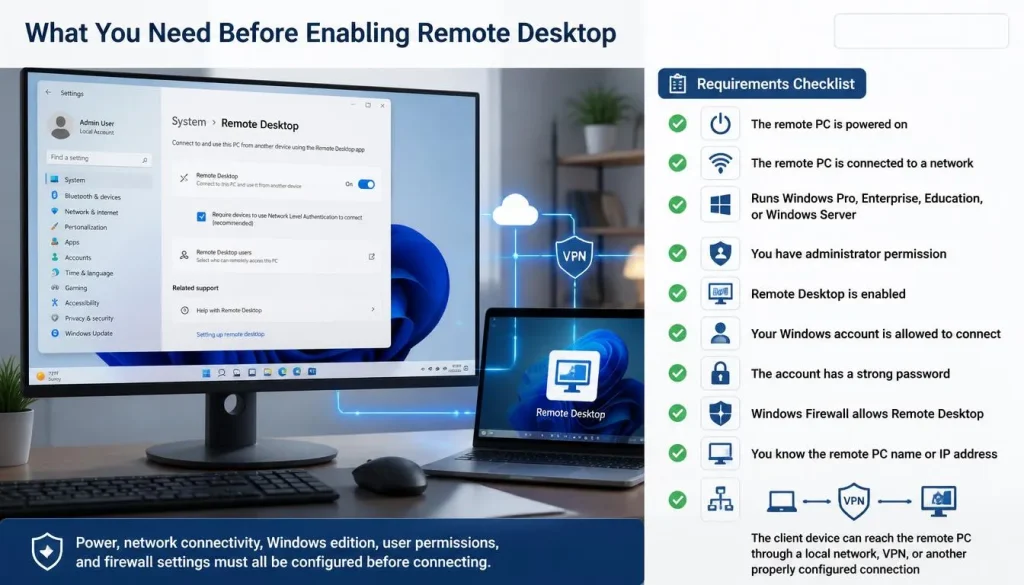
What You Need Before Enabling Remote Desktop
Confirm the following requirements before starting:
- The remote PC is powered on.
- The remote PC is connected to a network.
- It runs Windows Pro, Enterprise, Education, or a supported Windows Server edition.
- You have administrator permission on the remote PC.
- Remote Desktop is enabled.
- Your Windows account is allowed to connect.
- The account has a strong password.
- Windows Firewall allows Remote Desktop.
- You know the remote computer’s PC name or IP address.
- The client device can reach the remote computer over the local network, a VPN, or another properly configured connection.
Microsoft lists power, network access, user permission, Remote Desktop activation, and firewall access among the main requirements for a successful connection.
How to Turn On Remote Desktop in Windows 11 Through Settings
For most users, Windows Settings is the easiest and safest method.
Step 1: Open Windows Settings
Press Windows + I on your keyboard.
You can also:
- Open the Start menu.
- Select Settings.
Step 2: Open the Remote Desktop Page
In Settings:
- Select System.
- Scroll down.
- Select Remote Desktop.
Step 3: Enable Remote Desktop
Find the Remote Desktop option and turn the switch on.
Windows will display a confirmation message explaining that your PC will become available for remote connections.
Select Confirm.
Step 4: Keep Network Level Authentication Enabled
Leave Require devices to use Network Level Authentication to connect enabled unless an administrator has a specific compatibility reason to change it.
Network Level Authentication requires a user to authenticate before Windows establishes the complete remote session. Microsoft recommends enabling it in most environments because it reduces exposure to unauthorised connection attempts.
Step 5: Copy the PC Name
On the Remote Desktop settings page, find PC name.
Write it down exactly as displayed. You will enter this name on the client device when starting a connection.
The complete path is:
Start > Settings > System > Remote Desktop > Enable Remote Desktop
These are also the current activation steps documented by Microsoft.
How to Find the PC Name or IP Address for Remote Desktop
You can connect by entering either the computer’s hostname or an IP address.
Find the PC Name Through Settings
- Open Settings.
- Select System.
- Select About.
- Find Device name.
You can also find the PC name on the Remote Desktop settings page.
Find the PC Name Using Command Prompt
- Open the Start menu.
- Search for Command Prompt.
- Open it.
- Enter:
hostname
- Press Enter.
The result is the computer’s hostname.
Find the Local IP Address
To find the local IPv4 address:
- Press Windows + R.
- Enter:
cmd
- Select OK.
- Enter:
ipconfig
- Find the active Wi-Fi or Ethernet connection.
- Look for IPv4 Address.
A local address commonly looks similar to:
192.168.1.25
Should You Use the PC Name or IP Address?
Use the PC name first when both computers are on the same properly configured network.
Try the local IP address when:
- The PC name is not recognised
- Local hostname resolution is not working
- You are testing a network problem
- You are connecting through a VPN that routes private IP addresses
For Windows App on supported platforms, Microsoft allows the remote PC to be added using either its hostname or IP address.
A private IP address normally works only within the same local network or through a VPN. Do not assume that entering the private address from an unrelated internet connection will reach the PC.
How to Add Users to Remote Desktop
Administrators are generally permitted to connect after Remote Desktop is enabled. Additional standard users may need to be added to the Remote Desktop Users group.
To add another user:
- Open Settings.
- Select System > Remote Desktop.
- Open Remote Desktop users.
- Select Add.
- Enter the account name.
- Select Check Names if available.
- Select OK.
Only add people who genuinely require remote access.
Microsoft states that members of the Administrators group and users specifically granted permission can connect when Remote Desktop is enabled.
Which Username Should You Enter?
The correct username depends on the account type.
For a local Windows account, try:
PCNAME\username
You may also use:
.\username
For a Microsoft account, use the email address associated with the Windows account.
For a domain account, the format may be:
DOMAIN\username
Can You Use a Windows Hello PIN?
A Windows Hello PIN is linked to a particular device and is not always accepted as a standard Remote Desktop password.
When the PIN does not work, enter the actual password for the local, Microsoft, or organisational account.
Make sure the account has a password before attempting the connection. Accounts without passwords may be blocked from remote sign-in.
Check the Network and Windows Firewall Settings
Enabling Remote Desktop normally configures the relevant Windows Firewall rules. However, you should verify them if the connection fails.
Check Remote Desktop in Windows Firewall
- Open the Start menu.
- Search for Windows Defender Firewall.
- Open it.
- Select Allow an app or feature through Windows Defender Firewall.
- Find Remote Desktop.
- Confirm that it is allowed for the appropriate network profile.
Only enable the access required for your environment. Avoid opening unnecessary firewall access on an untrusted public network.
Check the Advanced Firewall Rules
For more detailed control:
- Press Windows + R.
- Enter:
wf.msc
- Select OK.
- Open Inbound Rules.
- Find the Remote Desktop rules.
- Confirm that the required rules are enabled.
Make the PC Discoverable on a Private Network
Windows may display an option labelled Make my PC discoverable on private networks to enable automatic connection from a remote device.
Microsoft currently enables this checkbox by default when Remote Desktop is activated.
Discovery can make local connections more convenient, but it is not a replacement for proper permissions or firewall configuration. You may still connect by entering the IP address when automatic discovery or hostname resolution does not work.
Does Remote Desktop Use Port 3389?
RDP uses TCP port 3389 by default. Microsoft’s troubleshooting guidance checks whether the RDP listener is operating on this port.
You usually do not need to manually open or forward port 3389 for connections within the same properly configured local network.
Other Ways to Enable Remote Desktop in Windows 11
The Settings method is best for most people. Administrators and advanced users may also use System Properties, PowerShell, Command Prompt, Group Policy, or Registry Editor.
Run command-line methods with administrator privileges.
Enable Remote Desktop Through Control Panel or System Properties
- Press Windows + R.
- Enter:
sysdm.cpl
- Select OK.
- Open the Remote tab.
- Under Remote Desktop, select Allow remote connections to this computer.
- Keep Network Level Authentication enabled where supported.
- Select Apply.
- Select OK.
This method changes the same general remote-access configuration through the classic System Properties interface.
Enable Remote Desktop Using PowerShell
Right-click the Start button and open Terminal (Admin) or Windows PowerShell (Admin).
Run:
Set-ItemProperty -Path "HKLM:\System\CurrentControlSet\Control\Terminal Server" -Name "fDenyTSConnections" -Value 0
Then enable the Remote Desktop firewall group:
Enable-NetFirewallRule -DisplayGroup "Remote Desktop"
Alternatively:
Get-NetFirewallRule -DisplayGroup "Remote Desktop" | Set-NetFirewallRule -Enabled True
The first command changes the local setting that blocks incoming Remote Desktop connections. The firewall command enables the corresponding Windows Firewall rules. Similar commands are documented in Microsoft’s RDP troubleshooting resources.
Restart the computer if the setting does not become active immediately.
Enable Remote Desktop Using Command Prompt
Open Command Prompt as administrator and run:
reg add "HKLM\SYSTEM\CurrentControlSet\Control\Terminal Server" /v fDenyTSConnections /t REG_DWORD /d 0 /f
Then enable the Remote Desktop firewall rule group:
netsh advfirewall firewall set rule group="remote desktop" new enable=Yes
Microsoft’s RDP troubleshooting documentation uses the fDenyTSConnections registry value to determine whether incoming remote connections are allowed. A value of 0 permits them, while a value of 1 blocks them.
On a business-managed device, domain policy may later overwrite a local command-line change.
Enable Remote Desktop Through Group Policy
The Local Group Policy Editor is generally available on Pro, Enterprise, and Education editions.
- Press Windows + R.
- Enter:
gpedit.msc
- Select OK.
- Navigate to:
Computer Configuration
> Administrative Templates
> Windows Components
> Remote Desktop Services
> Remote Desktop Session Host
> Connections
- Open Allow users to connect remotely by using Remote Desktop Services.
- Select Enabled.
- Select Apply.
- Select OK.
To enforce Network Level Authentication, go to:
Computer Configuration
> Administrative Templates
> Windows Components
> Remote Desktop Services
> Remote Desktop Session Host
> Security
Open Require user authentication for remote connections by using Network Level Authentication and set it to Enabled.
Microsoft documents these policy settings for controlling whether authorised Remote Desktop Users can connect and whether NLA is required.
You may run the following command to refresh policy:
gpupdate /force
Enable Remote Desktop Through Registry Editor
Use Registry Editor only when you understand the risks. Incorrect registry changes can prevent Windows features from working correctly.
- Press Windows + R.
- Enter:
regedit
- Select OK.
- Navigate to:
HKEY_LOCAL_MACHINE\SYSTEM\CurrentControlSet\Control\Terminal Server
- Find fDenyTSConnections.
- Set its value to:
0
- Enable the Remote Desktop firewall rules.
- Restart Windows if necessary.
Changing the registry alone may not be enough if a Group Policy setting disables RDP or Windows Firewall still blocks the connection. Microsoft recommends backing up the registry before making changes.
Can You Turn On Remote Desktop Remotely?
It may be possible to enable RDP on another computer without physically sitting in front of it, but only when another administrative management channel is already available.
Possible options include:
- PowerShell remoting
- Domain Group Policy
- Microsoft Intune or another device-management platform
- Remote Registry in a controlled environment
- An existing remote-support tool
- Virtual machine management consoles
For example, Microsoft notes that Remote Desktop services can be managed remotely through PowerShell when the target computer is already configured to accept remote PowerShell commands.
If Remote Desktop is disabled and no other management method is available, someone may need physical or console access to the computer.
Do not attempt to enable Remote Desktop on a device without the owner’s permission.
How to Connect from Another Windows PC
After enabling Remote Desktop on the target computer:
- Move to the Windows device you want to connect from.
- Open the Start menu.
- Search for Remote Desktop Connection.
- Open the application.
- Enter the remote computer’s PC name or IP address.
- Select Connect.
- Enter the authorised account credentials.
- Review the identity or certificate prompt.
- Continue only when you trust the target computer.
You can also open Remote Desktop Connection by pressing Windows + R and entering:
mstsc
Microsoft currently recommends the built-in Remote Desktop Connection application, also known as MSTSC, as the generally available Windows client for direct remote PC connections.
Configure Display and Local Resources
Before selecting Connect, choose Show Options.
You can then adjust:
- Display resolution
- Full-screen mode
- Audio playback
- Clipboard access
- Printers
- Local drives
- Connection quality
- Saved credentials
Only redirect local drives and other resources when you trust the remote computer.
How to Connect from a Mac
Microsoft’s Windows App supports remote PC connections from macOS.
- Install and open Windows App.
- Open the Devices area.
- Select the plus icon.
- Select Add PC.
- Enter the hostname or IP address.
- Add the authorised user account if desired.
- Save the PC.
- Double-click the device to connect.
Microsoft currently supports Windows App remote PC connections on actively supported macOS devices running macOS 12 or later.
How to Connect from an iPhone or iPad
- Install Windows App.
- Allow local network access when prompted.
- Open the application.
- Select the plus icon.
- Select PC.
- Enter the PC name or IP address.
- Add the authorised account.
- Save the connection.
- Tap the remote PC.
Microsoft’s current requirements list iOS or iPadOS 16 or later on an actively supported device.
How to Connect from Android or ChromeOS
- Install Windows App from Google Play.
- Open the application.
- Select the option to add a connection.
- Choose PC connection.
- Enter the PC name or IP address.
- Save the connection.
- Select the remote PC.
- Enter the authorised Windows credentials.
- Review the trust and local-resource permissions.
- Select Connect.
Microsoft currently lists Android 10 or later and ChromeOS 126 or later among the requirements for Windows App remote PC connections.
Remote Desktop Connection vs Windows App
Microsoft’s remote-access application names have changed over time, which can make the setup confusing.
| Client device | Recommended application |
|---|---|
| Windows PC | Remote Desktop Connection, also called MSTSC |
| macOS | Windows App |
| iPhone or iPad | Windows App |
| Android or ChromeOS | Windows App |
Remote PC connections in Windows App on Windows are currently described as a preview feature. For a generally available direct connection from a Windows PC, Microsoft advises continuing to use the built-in Remote Desktop Connection application.
Remote Desktop vs Quick Assist
Remote Desktop and Quick Assist serve different purposes.
Use Remote Desktop When:
- You need ongoing access to your own computer
- The remote PC may be unattended
- You want a complete Windows remote session
- The remote account and network are already configured
Use Quick Assist When:
- Someone is available at the other computer
- You are providing temporary technical support
- The user should approve screen sharing
- You do not want to configure permanent RDP access
Quick Assist uses a temporary six-digit code and lets the person receiving help approve screen sharing and, when requested, full control.
Connect on the Same Network or Over the Internet
Your setup depends on whether the devices are on the same local network.
Connect Over a Local Network
When both devices are connected to the same home or office network:
- Enable Remote Desktop on the host.
- Confirm the firewall rules.
- Find the PC name or local IPv4 address.
- Open the Remote Desktop client.
- Enter the PC name or IP address.
- Sign in with an authorised account.
This is usually the simplest setup because the devices can communicate within the private network.
Connect from Outside the Local Network
A private IP address is not normally reachable directly from an unrelated external network.
Microsoft identifies two broad methods for outside-network access:
- Configure a VPN
- Configure router port forwarding
However, Microsoft warns that forwarding Remote Desktop directly to the public internet opens the computer to internet traffic and states that using a VPN is preferable.
Safer Option: Use a VPN
A VPN allows the client device to join or securely reach the private network containing the remote PC.
After connecting to the VPN, you may be able to use the remote computer’s private hostname or IP address as though you were on the local network.
Business users should follow their organisation’s approved VPN and remote-access procedures.
Avoid Directly Exposing RDP When Possible
Directly forwarding TCP port 3389 to a Windows computer can increase exposure to:
- Automated login attempts
- Credential attacks
- Internet scanning
- Unpatched vulnerabilities
- Incorrect router or firewall rules
Do not publish an RDP port to the internet without understanding the risks and implementing appropriate access controls.
How to Keep Remote Desktop Secure
Remote Desktop is powerful, but enabling it creates an additional path into the computer.
Follow these security practices:
- Enable it only when needed.
- Use a strong and unique Windows password.
- Keep Network Level Authentication enabled.
- Allow only specific authorised users.
- Remove accounts that no longer require access.
- Keep Windows fully updated.
- Use a trusted network.
- Prefer a VPN for access from outside the local network.
- Avoid exposing port 3389 directly to the internet.
- Do not share passwords or saved RDP files publicly.
- Review redirected drives, printers, microphones, and clipboard permissions.
- Lock or sign out of the remote session when finished.
- Turn off Remote Desktop when it is no longer required.
Microsoft advises enabling Remote Desktop only on trusted networks and using strong, unique passwords for all accounts permitted to connect.
Remote Desktop Not Working? Try These Fixes
Start with the simplest checks before changing advanced settings.
Fix “Remote Desktop Can’t Connect to the Remote Computer”
Confirm that:
- The remote PC is powered on.
- It is not sleeping or hibernating.
- It is connected to the network.
- Remote Desktop is enabled.
- You entered the correct hostname or IP address.
- The user account has permission.
- Windows Firewall allows the connection.
- The account password is correct.
- A VPN is connected when required.
- No business policy is blocking RDP.
Try connecting with the IP address if the PC name does not work.
Remote Desktop Option Is Missing or Greyed Out
Possible causes include:
- The computer runs Windows Home.
- You do not have administrator permission.
- The device is managed by an organisation.
- A local or domain Group Policy controls the setting.
- Security software or management software is enforcing a configuration.
- The Windows installation has a system or update problem.
Microsoft recommends checking whether a Group Policy Object is blocking RDP when the Remote Desktop options are unavailable.
The Username or Password Is Not Working
Try the following:
- Confirm that you are using the remote PC’s account, not the client device’s account.
- Enter the full Microsoft account email address where applicable.
- For a local account, try:
PCNAME\username
- Try:
.\username
- Use the account password instead of the Windows Hello PIN.
- Check Caps Lock and the keyboard layout.
- Remove previously saved credentials.
- Enter the credentials again.
To remove saved credentials:
- Open Control Panel.
- Select Credential Manager.
- Open Windows Credentials.
- Find the saved entry for the remote computer.
- Remove it.
- Reconnect and enter the correct details.
The Remote PC Cannot Be Found
Check the following:
- The PC name is spelled correctly.
- Both devices can reach each other.
- The VPN is connected.
- The remote computer’s IP address has not changed.
- Local name resolution is functioning.
- The router is not isolating wireless devices.
- Firewall rules allow the connection.
Try the local IPv4 address instead of the hostname.
You can test basic connectivity from Command Prompt:
ping PCNAME
Or:
ping 192.168.1.25
A failed ping does not always prove that RDP is unavailable because some networks block ping traffic. However, the result may help identify a broader connectivity problem.
Remote Desktop Stops Working When the PC Sleeps
Remote Desktop cannot create a normal connection to a computer that is completely powered off or unavailable on the network.
Review the host computer’s sleep settings:
- Open Settings.
- Select System > Power & battery.
- Open Screen and sleep.
- Choose settings that keep the PC available when remote access is required.
Balance remote availability against electricity use and device security.
Wake-on-LAN may help in some environments, but it requires compatible hardware, firmware, network, and router configuration.
Remote Desktop Shows a Black Screen
Try these steps:
- Wait briefly for the desktop to load.
- Disconnect and reconnect.
- Restart the remote computer.
- Install Windows and graphics-driver updates.
- Reduce the Remote Desktop display resolution.
- Disable unnecessary local-resource redirection.
- Test with one monitor.
- Close a stuck session through an administrator account if available.
If the problem affects only one client device, clear its saved credentials and test from another Remote Desktop client.
Remote Desktop Error 0x204
Error 0x204 is commonly associated with the client being unable to complete the connection.
Check:
- The PC name or IP address
- Network reachability
- Firewall rules
- Remote Desktop activation
- User permission
- VPN connectivity
- Whether the computer is awake
- Whether the RDP listener is running
On mobile devices, also verify that the application has local network permission where required.
Check Remote Desktop Services
Press Windows + R, enter:
services.msc
Then confirm that these services are running:
- Remote Desktop Services
- Remote Desktop Services UserMode Port Redirector
Microsoft identifies these services as part of its general RDP troubleshooting process.
Do not make unsupported changes to service accounts or startup settings.
Check the RDP Listener
Open Command Prompt or PowerShell as administrator and run:
qwinsta
Look for an entry similar to:
rdp-tcp Listen
If rdp-tcp appears with the status Listen, the RDP listener is operating.
Microsoft uses this check in its Remote Desktop troubleshooting guidance. It also expects the listener to use port 3389 by default.
You can also test the port from another Windows computer with PowerShell:
Test-NetConnection -ComputerName PCNAME -Port 3389
Replace PCNAME with the hostname or IP address of the remote PC.
If TcpTestSucceeded returns False, investigate network routing, firewall rules, VPN configuration, or the RDP listener.
Can You Enable Remote Desktop on Windows 11 Home?
Windows 11 Home cannot normally act as an incoming Remote Desktop host.
It can still run Remote Desktop Connection and connect to another PC running a supported host edition. Therefore, only the computer being controlled must run Pro, Enterprise, Education, or a supported Windows Server edition.
Remote-Access Alternatives for Windows 11 Home
Possible alternatives include:
- Quick Assist
- Chrome Remote Desktop
- An approved business remote-support platform
- Upgrading Windows Home to Windows Pro
Choose software with clear security controls, active development, reputable support, and account protection.
How to Turn Off Remote Desktop
Turn off Remote Desktop when you no longer need incoming connections.
- Press Windows + I.
- Select System.
- Select Remote Desktop.
- Turn off the Remote Desktop switch.
- Confirm the change if prompted.
After disabling it, the computer will stop accepting new standard Remote Desktop connections.
What About Remote Desktop on Windows 10?
The basic Windows 10 setup path is similar:
Start > Settings > System > Remote Desktop
However, standard Windows 10 support ended on 14 October 2025. Microsoft no longer provides ordinary free security updates, technical support, or software fixes for unsupported Windows 10 installations. Users should move to a supported version of Windows where possible.
Do not expose an unsupported Windows 10 computer to remote internet access without carefully considering the security risk.
Frequently Asked Questions
How do I turn on Remote Desktop in Windows 11?
Open Settings > System > Remote Desktop, turn on Remote Desktop, and select Confirm. Save the displayed PC name so you can enter it on the connecting device.
Why can’t I find Remote Desktop in Windows 11 Home?
Windows 11 Home cannot act as a standard Remote Desktop host. It can connect to another supported host, but it cannot normally receive incoming RDP connections.
Do both computers need Windows 11 Pro?
No. The host computer receiving the connection must use a supported edition such as Windows Pro, Enterprise, or Education. The client computer can use Windows Home because it only needs to run the connection application.
Is Remote Desktop free?
The Remote Desktop feature is included with supported Windows editions. You may still have costs associated with upgrading Windows, business networking, VPN services, mobile data, or third-party infrastructure.
What do I enter in the Computer field?
Enter the remote PC’s hostname or reachable IP address. Use the local hostname or private IPv4 address on the same network. For external access, use an organisation-approved VPN or properly configured remote-access system.
Can I use Remote Desktop when the computer is asleep?
A computer that is asleep, powered off, or disconnected from the network will not normally accept a new Remote Desktop connection. Configure appropriate power settings if the machine must remain remotely available.
Can I connect from a Mac?
Yes. Install Windows App, add the remote PC using its hostname or IP address, and sign in with an authorised Windows account.
Can I connect from an iPhone or Android phone?
Yes. Windows App supports remote PC connections on compatible iOS, iPadOS, Android, and ChromeOS devices. The phone or tablet must have network access to the remote computer.
Is it safe to turn on Remote Desktop?
It can be used securely when it is properly configured. Use strong passwords, Network Level Authentication, restricted user permissions, current Windows updates, trusted networks, and a VPN for outside access. Avoid exposing RDP directly to the public internet.
What is the difference between RDP and Remote Desktop?
RDP stands for Remote Desktop Protocol. It is the protocol used to carry the remote session. Remote Desktop is the Windows feature and collection of applications that use RDP.
What is the difference between Remote Desktop and Remote Desktop Connection?
Remote Desktop refers broadly to the remote-access feature. Remote Desktop Connection is the built-in Windows client application, commonly launched with the mstsc command.
Why does the PC name not work but the IP address does?
The network may be unable to translate the hostname into an IP address. This can happen because of DNS, local name-resolution, VPN, router, or network-discovery configuration. Using the reachable IP address bypasses the hostname lookup.
Final Thoughts
Learning how to turn on Remote Desktop requires more than activating a single switch. A successful setup depends on the correct Windows edition, user permissions, network access, firewall configuration, account credentials, and secure connection method.
For most Windows 11 users, the complete process is:
- Confirm that the host runs Windows Pro, Enterprise, or Education.
- Open Settings > System > Remote Desktop.
- Enable Remote Desktop.
- Keep Network Level Authentication turned on.
- Copy the PC name.
- Add any required users.
- Confirm the firewall settings.
- Connect with Remote Desktop Connection or Windows App.
- Use a VPN when connecting from outside the local network.
- Disable remote access when it is no longer required.
Following these steps will help you configure a more reliable and secure Windows Remote Desktop connection without relying on unsupported workarounds.

Nathaniel Foster is an electronics expert focusing on consumer gadgets, smart devices, and innovative technology. He delivers practical reviews, buying guides, and troubleshooting tips to help readers make informed decisions and get the most out of their electronic products.